My Account     Contact Us     Cart

Update Your Legends (Even Existing Ones) Using Automatic Legend Update

With the release of MAPublisher 10.1, you no longer have to worry about recreating map legends every time you update them. Automatic Legend Update, available in the latest release, now allows for simple updating of an existing legend. Automatic Legend Update lets you update attribute data, or change the symbology/classification method/attribute field that is linked to a legend, and automatically have the legend update to reflect these changes – no more having to recreate the legend each time you want to change something! This is possible even with MAP Themes and Legends created in older MAPublisher versions once they are brought into the 10.1 environment.

In this blog, we’ll discuss how to open MAP Themes and Legends created in older versions of MAPublisher in the 10.1 environment in order to transform them into Automatic Legend Update. This example classifies populated places in Hawaii based on elevation. We will use the ‘Create MAP Theme Legend’ tool to create a copy of the legend, which by default will be set to automatically update. Any future changes applied to the associated MAP Theme will automatically be applied to the new legend.

Step 1

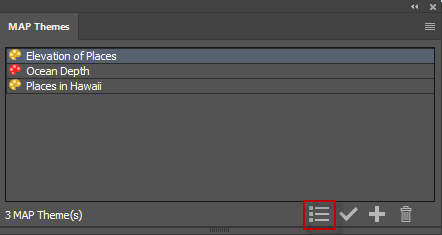
Open the MAP Themes panel from the MAPublisher toolbar. With the ‘Elevations of Places’ MAP Theme selected, click the ‘Create MAP Theme Legend’ button to create an Automatic Legend Update.

Step 2

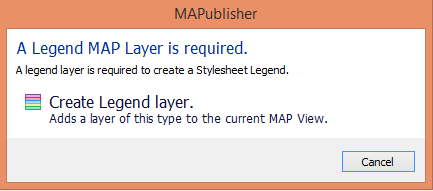
You’ll be prompted to create a Legend layer if you don’t already have one. Click ‘Create Legend Layer’ to continue.

Step 3

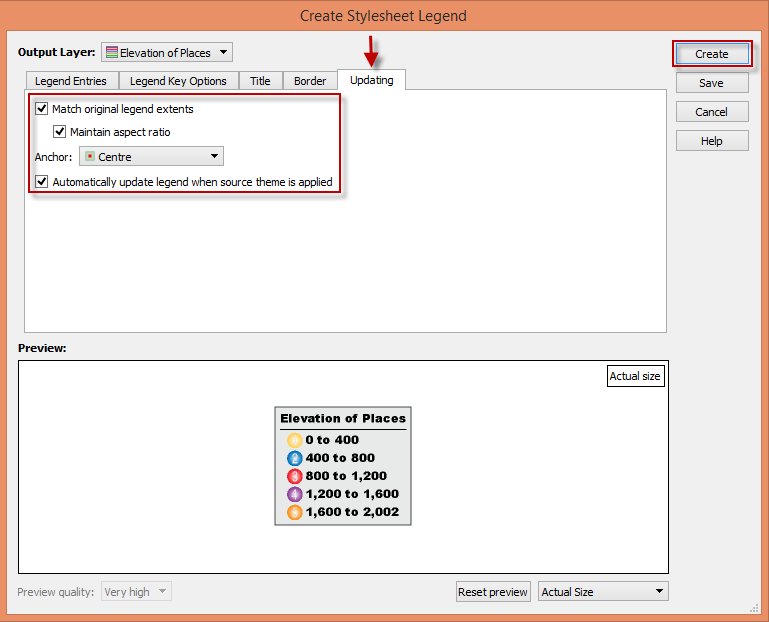
Note the legend in the ‘Preview’ section and how the legend styling and symbology are preserved, thus saving time. Click the ‘Updating’ tab to see or change your Automatic Legend Update settings. The “Automatically update legend when source theme is applied” checkbox is checked by default. In this blog, we’re also going to check the option to “Match original legend extents” to maintain the size and extents of the legend so as to not change the map layout when items are added to the legend. Instead, the legend elements will change size in order to fit within the existing legend extents. “Maintain aspect ratio” is checked to make sure that the legend elements resize proportionally and a ‘Centre’ anchor allows the resizing to start from the centre of the elements. Once you’re satisfied with your settings, click ‘Create’.

This will create a new legend with Automatic Legend Update that can be moved to any location on the map.

Now that you have created a copy of the legend with Automatic Legend Update, your legend will update when changes are applied to the associated MAP Theme.

A legend characterises a map and MAPublisher 10.1 helps to keep it up to date.

Styling a MAPublisher Scale Bar

After generating a scale bar, it is placed in a MAP Legend layer. You can accept the default look of it, but majority of users will want to customize and style it to match their map.

Now I’ve just generated a simple scale bar. If you expand the Legend layer, you can see the object “MAPublisher Scalebar” is placed within it. This is a special object generated by MAPublisher and there is currently a dynamic link between the MAP View information (i.e. spatial information) and the scale bar object.

Generated Scale bar in the MAP Legend layer

In order to make a custom scale bar, you will have to break the dynamic link between MAPublisher and the scale bar object. In your own workflow, it’s important that you setup the scale before breaking the link because it will not rescale dynamically after the link is broken. Break the link by expanding the generated object.

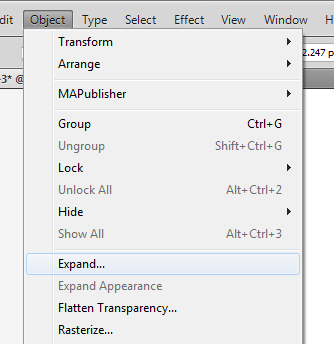
From the main menu, choose Object > Expand.

From Adobe Illustrator Menu, Object > Expand

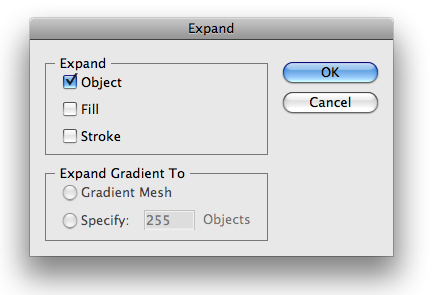
In the Expand dialog box, click the “Object” check box, then click OK.

Expand diaog window

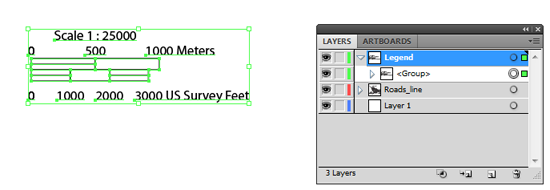
The result: the object <MAPublisher Scalebar> is replaced by an object called <Group> in the Layers panel. The connection between the scale bar object and MAPublisher is removed. The art in the scale bar object simply became grouped objects.

Expanded Scale Bar Object

At this point, select objects in the group and change its colors and lines by using the direct selection tool Adobe Direct Selection tool. The direct selection tool allows you to select individual object even if select objects is a part of a <Group> object.

If you are more comfortable with the selection tool Adobe Illustrator Selection Tool, you will want to read the suggestion below. It works, too.

Take a look at the Layers panel again more closely. The screen capture of the Legend layer above shows that there is a <Group> object under the “Legend” layer. When the object tree under the “Legend” layer is expanded, you can see another <Group> object nested within a <Group> object. (a <Group> object containing a <Group> object). Since all the objects are still grouped, you can simply “ungroup” the art.

Expanded scale bar in the Layers panel

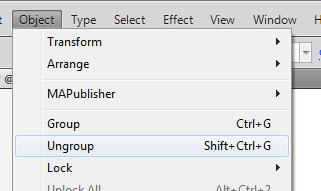
Select the <Group> object (i.e. the scale bar object for this example), then from the main menu, choose Object > Ungroup.

Adobe Illustrator menu: Ungroup

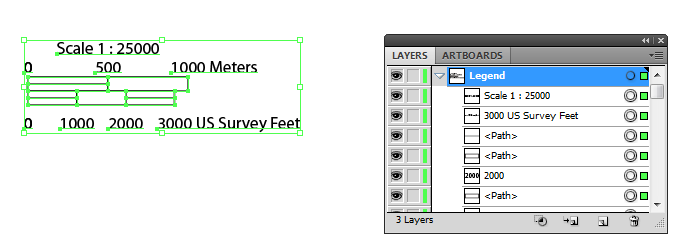
When you ungroup the object once, you now see only one <Group>. This <Group> object contains all the text, lines, and area objects composing a scale bar object.

Ungroup Once

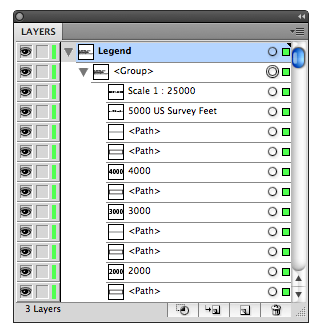
Now, ungroup the object once more. Finally you do not see the object <Group> anymore under the “Legend” layer. It indicates that every object in the layer can now be selected individually using the direct selection tool.

After the grouped object is ungrouped twice ....

Select the objects to edit and style them using Adobe Illustrator tools!

At the end ... now ready to be customized

News Archive