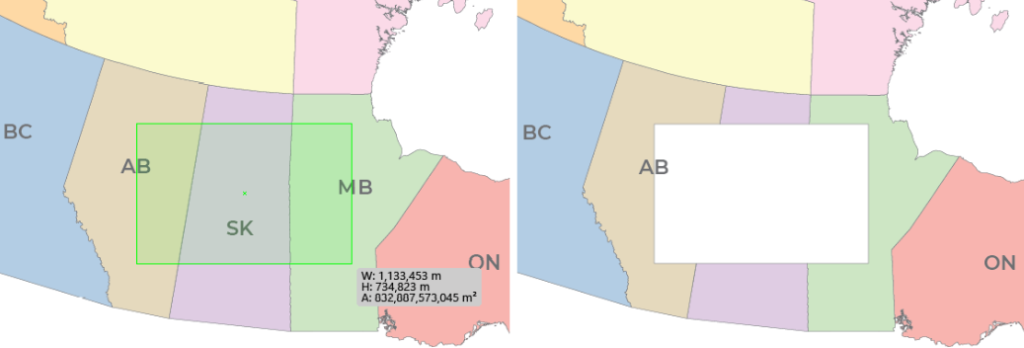
With the recent release of MAPublisher 11.0, the plugin now comes with a new set of three MAP Erase tools in its arsenal. In this blog, we would like to highlight how these tools work and differentiate between each of them.
Much like the MAP Crop tools, there are three slightly differing tools in the MAP Erase toolset: MAP Vector Erase Tool, MAP Vector Erase, and MAP Erase by Shape. The advanced settings for the MAP Erase tools are shared with the MAP Crop tools, and can be accessed in the MAPublisher Preferences window under “MAP Crop Tool”.
Also like the MAP Crop tools, there are limitations to the types of artwork that can be erased using these tools. The purpose of MAP Vector Erase is to cut and remove vector data (points, lines, and polygons), however some Adobe Illustrator-specific objects may not be erased properly using this tool:
- Blend and Live Paint objects
- Any art using effects that have been rasterized
- Custom art such as scale bars, grids/graticules, north arrows (this art must be expanded to crop)
- Compound shapes
- Legacy and overflowing text
- Locked objects (command box: either treat locked layers as unlocked or skip locked layers)
- Hidden layers (command box: either crop hidden layers or skip hidden layers)
- Images
MAP Vector Erase Tool
The MAP Vector Erase Tool can be selected from the Illustrator menu. You can draw a rectangle or ellipse shape on the portion of the map you would like to erase.

You can also click anywhere on the artboard which will open the MAP Vector Erase dialog box and specify crop options. Which leads us to the next Erase tool…
MAP Vector Erase
MAP Vector Erase can be accessed from the MAP Toolbar in the Geoprocessing section under the Crop menu as well. This will also result in the MAP Vector Erase dialog box opening. There are a few options you can use to customize how you want your erase shape to be created, as shown below. In my case, I have created a bounding box to perform my erase with, and I would like to apply it to all layers in my document.
You can also click the Advanced… button for further options, which is useful for deciding how your labels are affected by the MAP Erase tools.
The final result is very similar to the previous step, however the MAP Vector Erase dialog box allows for much more customization and specificity.
MAP Erase by Shape
The final tool in the Erase series is the MAP Erase by Shape tool, which is also located in the Crop menu of the Geoprocessing section of the MAP Toolbar. This tool can only be opened when there is a single polygon selected on the document, which will be the bounds for the erasure. The MAP Erase by Shape tool is useful when you wish to erase an area that is not a rectangular or elliptical shape. For example, in this example, I used the shape of Banff National Park to erase this portion of my map.
For more information about MAPublisher’s new MAP Erase tools, please visit our Support Centre.


